STABILO EASYbirdy Special Tool for Adjusting and Changing the Nib
Practical tool for the STABILO EASYbirdy school fountain pen
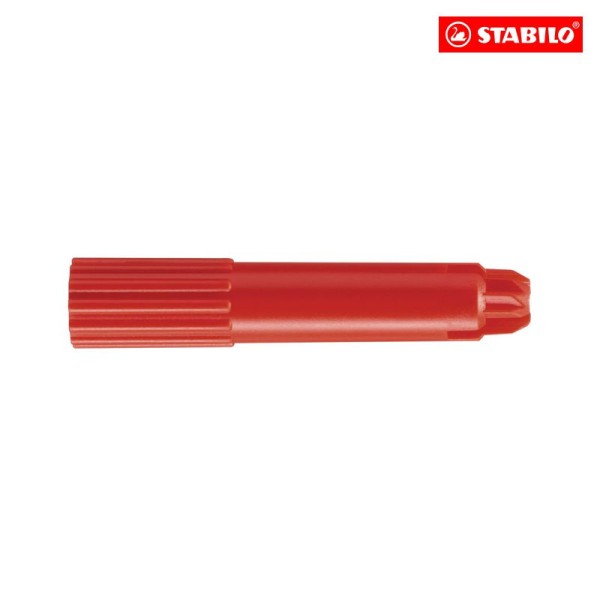
The STABILO EASYbirdy special tool is the matching tool for adjusting the individual nib angle and for changing the nib on the STABILO EASYbirdy. It lets you adapt the school fountain pen to the way your child holds it, so that the nib sits cleanly on the paper and supports a comfortable writing feel.
The individually adjustable nib angle is a special feature of the STABILO EASYbirdy. The nib can be set to three angles to encourage an ergonomic writing posture and make learning to write easier. The nib with iridium tip gives easy writing control and neat handwriting: it does not blot and does not scratch. STABILO describes the EASYbirdy as an ergonomic school fountain pen with a non-slip grip zone, adjustable nib angle and a shielded nib to prevent inky fingers.
– Special tool for the STABILO EASYbirdy
– For adjusting the individual nib angle
– Helps when changing the EASYbirdy nib
– For an ergonomic adjustment to the way the pen is held
– Nib angle adjustable to three positions
– For school, beginners in writing and everyday use
– Fits the STABILO EASYbirdy school fountain pen
Step-by-step instructions for adjusting the EASYbirdy nib to suit your child
Step 1
Remove the cap of the pen.
Step 2
Unscrew the rear section from the front part (grip section) of the pen and remove the ink cartridge from the front part of the pen.
Step 3
Insert the red EASYbirdy adjustment tool into the grip section and turn it anticlockwise until the tip with the nib comes loose. You can then set the nib to three different positions with your fingers. The positions are marked by three small notches on the back of the nib.
Step 4
Now set one of the two other angles (+1 or -1) so that the point of the small triangle below the three notches points to one of the two outer notches. Hold the tip in your chosen position with your fingers and turn the thread closed clockwise with the adjustment tool until you hear a repeated click. The nib is now set to the desired position.
Step 5
Insert the ink cartridge into the front part and screw the rear part of the pen closed again.
Step 6
Let your child try the new setting and compare it with the factory setting (= zero position), paying attention to the following: a) whether the nib sits flat on the paper when put down b) whether the script is even and rich c) whether any scratching sounds can be heard d) how the child feels the writing is.
Step 7
Repeat steps 2 to 6 with the third nib setting.
Step 8
Finally, set the nib to the setting with the best overall result.
Tip:
The basic position (as delivered) of the fountain pen nib is always position 0 = the point of the small triangle below the three notches points to the middle notch.
a) If your child's grip tilts too far to the left, turn the nib one step to the right. Position -1 = the point of the small triangle below the three notches points to the left notch.
b) If your child's grip tilts too far to the right, turn the nib one step to the left. Position +1 = the point of the small triangle below the three notches points to the right notch.